30 Seamles Ground Textures v1.0
tga | Textures | 794 MB

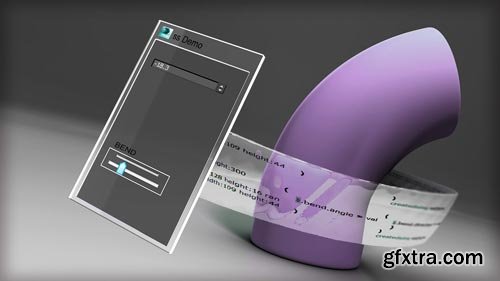
- Throughout these lessons, we'll be taking a look at SilhouetteFX. We'll start by learning how to navigate the interface and discussing the different tools we'll be using throughout the course. We'll then explore how powerful each node is, followed by rotoscoping different elements and discussing how to assign various tracking data to drive the spline. Then, we'll learn a new way of rotoscoping using IK joint to control the spline behavior. Finally, we'll extract fast and easy mattes using two different ways of Keying inside the software. We'll learn about the Paint node menu and how to create a dynamic, clean plate frame by frame. We'll continue by using the Morph node to animate two images into each other using splines to control the transformation. We'll finish by learning the stereo menu inside SilhouetteFX and how to overcome the offset between left and right eye when using the Roto and Paint node. A bonus final project was added to simulate a standard film post-production shot. We'll use what have learned so far to complete it and composite the different elements in NUKE for a final outlook. By the end of this course, you'll know how to rotoscope, track, extract matte, morph images, create clean plates in easy and difficult sequences inside SilhouetteFX, and export the final elements and shape data for use in NUKE.

CreativeMarket - Guest Dj Night Flyer 2179026
PSD

CreativeMarket - Ladies Night Party Flyer 2179610
PSD

- In this 3dsMax tutorial we'll use an edge modeling method to begin building our Maserati Gran Turismo. Computer generated cars are a staple of film and commercial projects. Whether the parts all fly together before our eyes in a commercial meant to show off superior engineering, or the car is tossed around by gigantic creatures in a feature film, there is a need to create 3D automotive models. The different parts of a car present specific challenges but also provide certain advantages. The workflow for creating a car can vary, from using splines and surfaces to box modeling. Once we're happy with the shape, we can cut the panels apart and add thickness. We'll cover methods for maintaining hard edges and smooth contours. We'll cover the common polygon modeling tools, as well as some new tools in the Modeling Ribbon that will make certain tasks much easier. It's a big project, but we'll go step by step so that by the end, you'll have created a 3D car from scratch and have the knowledge you need to build your own vehicle. Software required: 3ds Max 2015.
CreativeMarket - Fashion Night Glamour Flyer Psd 2179014
PSD
CreativeMarket - Djs All Night Flyer 2178982
PSD
CreativeMarket - Business Flyer Corporate Progress 2178956
PSD
- Throughout these 3ds Max tutorials you'll learn how to automate tasks within 3ds Max to help boost your productivity. You'll be introduced to the 3ds Max's native scripting language called MAXScript and learn about the tools and knowledge needed to begin automating processes within your pipeline. Those are just a few of the many topics that will be covered. Some other popular highlights include: Overview of MAXScript listener, Methods of Collection, Flow of Execution, Loops, Variable, and Interface Creation. Software required: 3ds Max 2014.
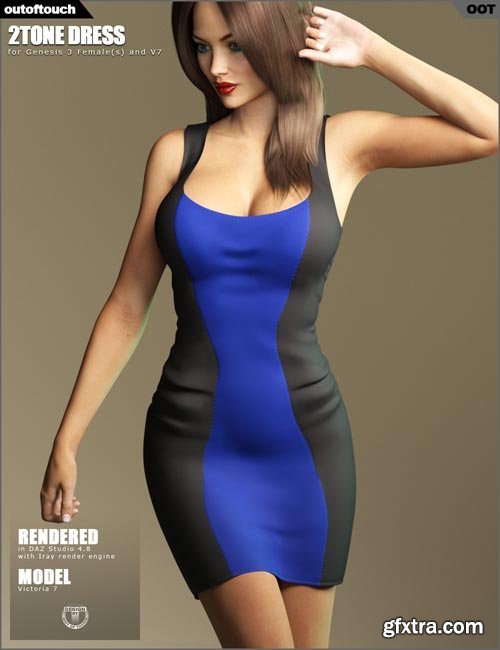
2Tone Dress for Genesis 3 Female(s)
Daz/Poser | 3D models | 67.98 MB
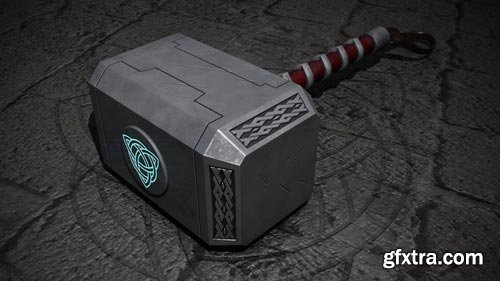
- In this series of Maya and Mudbox tutorials, we'll talk about the process of working on an asset using multiple applications - in this case Maya, Mudbox, and Photoshop. We'll begin by using Maya's powerful modeling tools to create some base geometry for a Thor inspired hammer. We'll learn to create a simple UV layout and then use those UVs to create a texture map that can help us add sculpted detail very quickly. Once we have our geometry set up in Mudbox, we'll look at ways of adding carved detail using sculpt layers. We'll also paint texture maps for our objects and learn to add new geometry to our project as it progresses. Once we're done, we'll bake out normal maps and combine them with existing bump maps. Finally, we'll transfer our project back out of Mudbox to Maya. This Maya and Mudbox training will go quickly, so if you're interested in more basic training in any of the applications used, I would recommend starting with the introductions to the particular applications and move on from there. Software required: Maya 2015, Mudbox 2015, Photoshop.
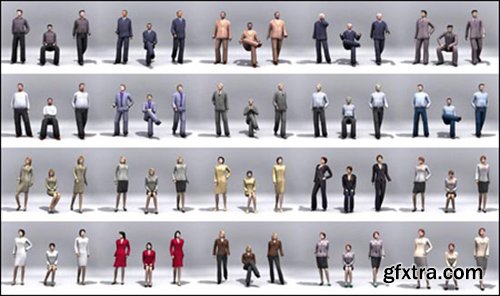
2D and 3D People Models
max | 3ds | 3D models | 882 MB
Couple of packs with people for arch viz, AXYZ, Got3D, Imagecels and Lowpolygon3D. Some posed, some in T-pose, all textured.

- In collaboration with Autodesk, Digital-Tutors is excited to teach you about some of the powerful tools found in 3ds Max, and explaining how these tools can be incorporated into a motion graphics project. We will start by looking at storyboards and animatics of the final project. From there, we will learn how to set up lights and materials for our scene inside of 3ds Max, we will learn how to use particles to create dynamic effects such as sparks for our project, and we will spend several lessons discussing the new State Set feature, which is a powerful new system for creating and managing your render passes within 3ds Max. We will also learn how this State Set tool allows for the seamless transfer of rendered passes, 3D cameras, lights, and helper objects from 3ds Max directly into After Effects. From here, we will learn how to use helper objects from 3ds Max to quickly create 3D layers in After Effects, use 3D nulls to drive 2D effects like lens flares and glows, and learn how Maxscripting and expressions can be used to create highly-customized, procedural animation effects within 3ds Max. Software required: 3ds Max 2013, After Effects CS6.

25 Free 3D Furniture Model by ODESD2
max | 3D models | 320 MB
It is great to see design studios offer 3d models of their items like Ukrainian based Design BureauODESD2 did a week ago with their entire furniture line of 25 items! They kindly share MAX and OBJ formats along with textures as well as 2d blueprints so that anyone can use them in their projects and visualizations.

21 Daz Blond Wigs Max2010 Vray & Obj
max | mtl | obj | 3D models | 129 MB
Various Daz Vicky 4 hair models, don’t ask why I put them all in one scene or obj….lol..but they are not that complex, all textures are blond with alphas (you can change the blond texture in PS real easy to other colours)I have only giving you one test Vicky bust..as having them all bloated the file.
2005 Ford Mustang for Poser
Daz/Poser | 3d models | 22.05 MB

- Throughout these lessons, we'll look at matte painting techniques that can be applied to web design. In this tutorial, we'll talk about poor quality imagery, how to fix images, and how to work around problematic graphics that can cause problems for even the most seasoned web veteran. By the end of this tutorial you'll be able to work faster, smarter, and output images that look much better than anticipated. Software required: Photoshop CS3.
- In this Photoshop tutorial, we'll look at how we can use Photoshop as an animation tool. We'll start by getting familiar with the timeline in Photoshop and the differences between video and regular layers. We'll then look at what extremes and keyframes are and why they're important to animation. Next, we'll discover how using onion skins can help our workflow by allowing us to see the natural curve of movement. We'll go over breakdowns, in-betweens and the different roles that they play in pose-to-pose animation. We'll also create straight ahead animation and look at when we would use this technique over pose-to-pose. By the end of this Photoshop training, you'll have a greater understanding of how animation works and will be well on your way to creating your own stories. Software required: Photoshop CC 2015.
- In this Photoshop tutorial, we'll look at how we can use Photoshop as an animation tool. We'll start by getting familiar with the timeline in Photoshop and the differences between video and regular layers. We'll then look at what extremes and keyframes are and why they're important to animation. Next, we'll discover how using onion skins can help our workflow by allowing us to see the natural curve of movement. We'll go over breakdowns, in-betweens and the different roles that they play in pose-to-pose animation. We'll also create straight ahead animation and look at when we would use this technique over pose-to-pose. By the end of this Photoshop training, you'll have a greater understanding of how animation works and will be well on your way to creating your own stories. Software required: Photoshop CC 2015.
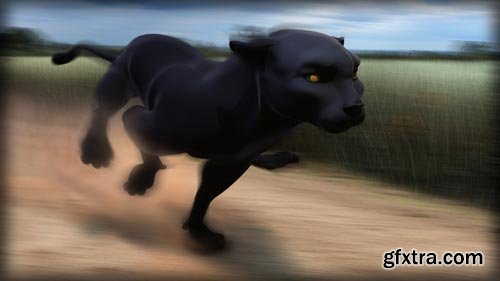
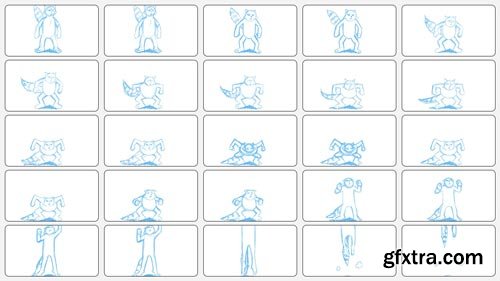
- In this series of tutorials we will learn how to animate a run cycle for a quadruped-type creature. We'll start by learning how to set our animation preferences. We'll then have a look at references we can use to guide us in achieving realism throughout the animation. After this, we'll begin our blocking pass, and from there, we'll move to refining our work with time-saving techniques. Once we've completed the cycle, we'll then learn how to translate it forward. By the end of this training, you'll have the skill-set to animate your own quadrupeds in Maya. Software required: Autodesk Maya 2014.
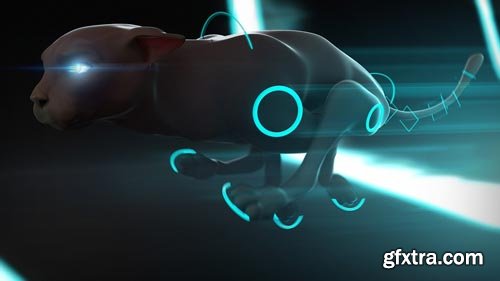
- In this series of tutorials we will learn how to animate a run cycle for a quadruped-type creature. We'll start by learning how to set our animation preferences. We'll then have a look at reference we can use to guide us in achieving realism throughout the animation. After this, we'll begin our blocking pass and from there, we'll move to refining our work with time-saving techniques. Once we've completed the cycle, we'll then learn how to translate it forward. By the end, you'll have the skill-set to animate your own quadrupeds in 3ds Max. Software required: Autodesk 3ds Max 2014.
- Throughout these lessons, we'll learn how to animate in-game locomotion animations for biped characters. We'll look at the mechanics of using Maya 2014 as a sketching tool for designing the animations. Functions we'll address are the graph editor, key frames, in-betweens and breakdowns as well as basic functionality of animation layers. Animations we'll focus on include idle, run, jump, attack, hit-reaction, death, celebration and deselect-idle animations. By the end of this tutorial you will have a deeper understanding of how to animate an in-game biped character using Maya. Software required: Maya 2014.

CreativeMarket - Godlike font + Logo Templates 2179624
OTF, PSD, AI
SermonBox - Seasonal Collection

SermonBox - The Series Pack Collection
Top Rated News


Would you like to be a Author?